Abstract:
The HyperRail is currently being controlled by the Arduino’s command line interface or CLI. But it is quite the process to change some parameters and restart the program; this whole process is not user-friendly especially if you have never used the Arduino IDE or have any coding experience. To make it easier to use I created a graphical user interface or GUI.
Objective:
- Create a GUI for the HyperRail so that the system is easier to use compared to using the command line interface.
Design:
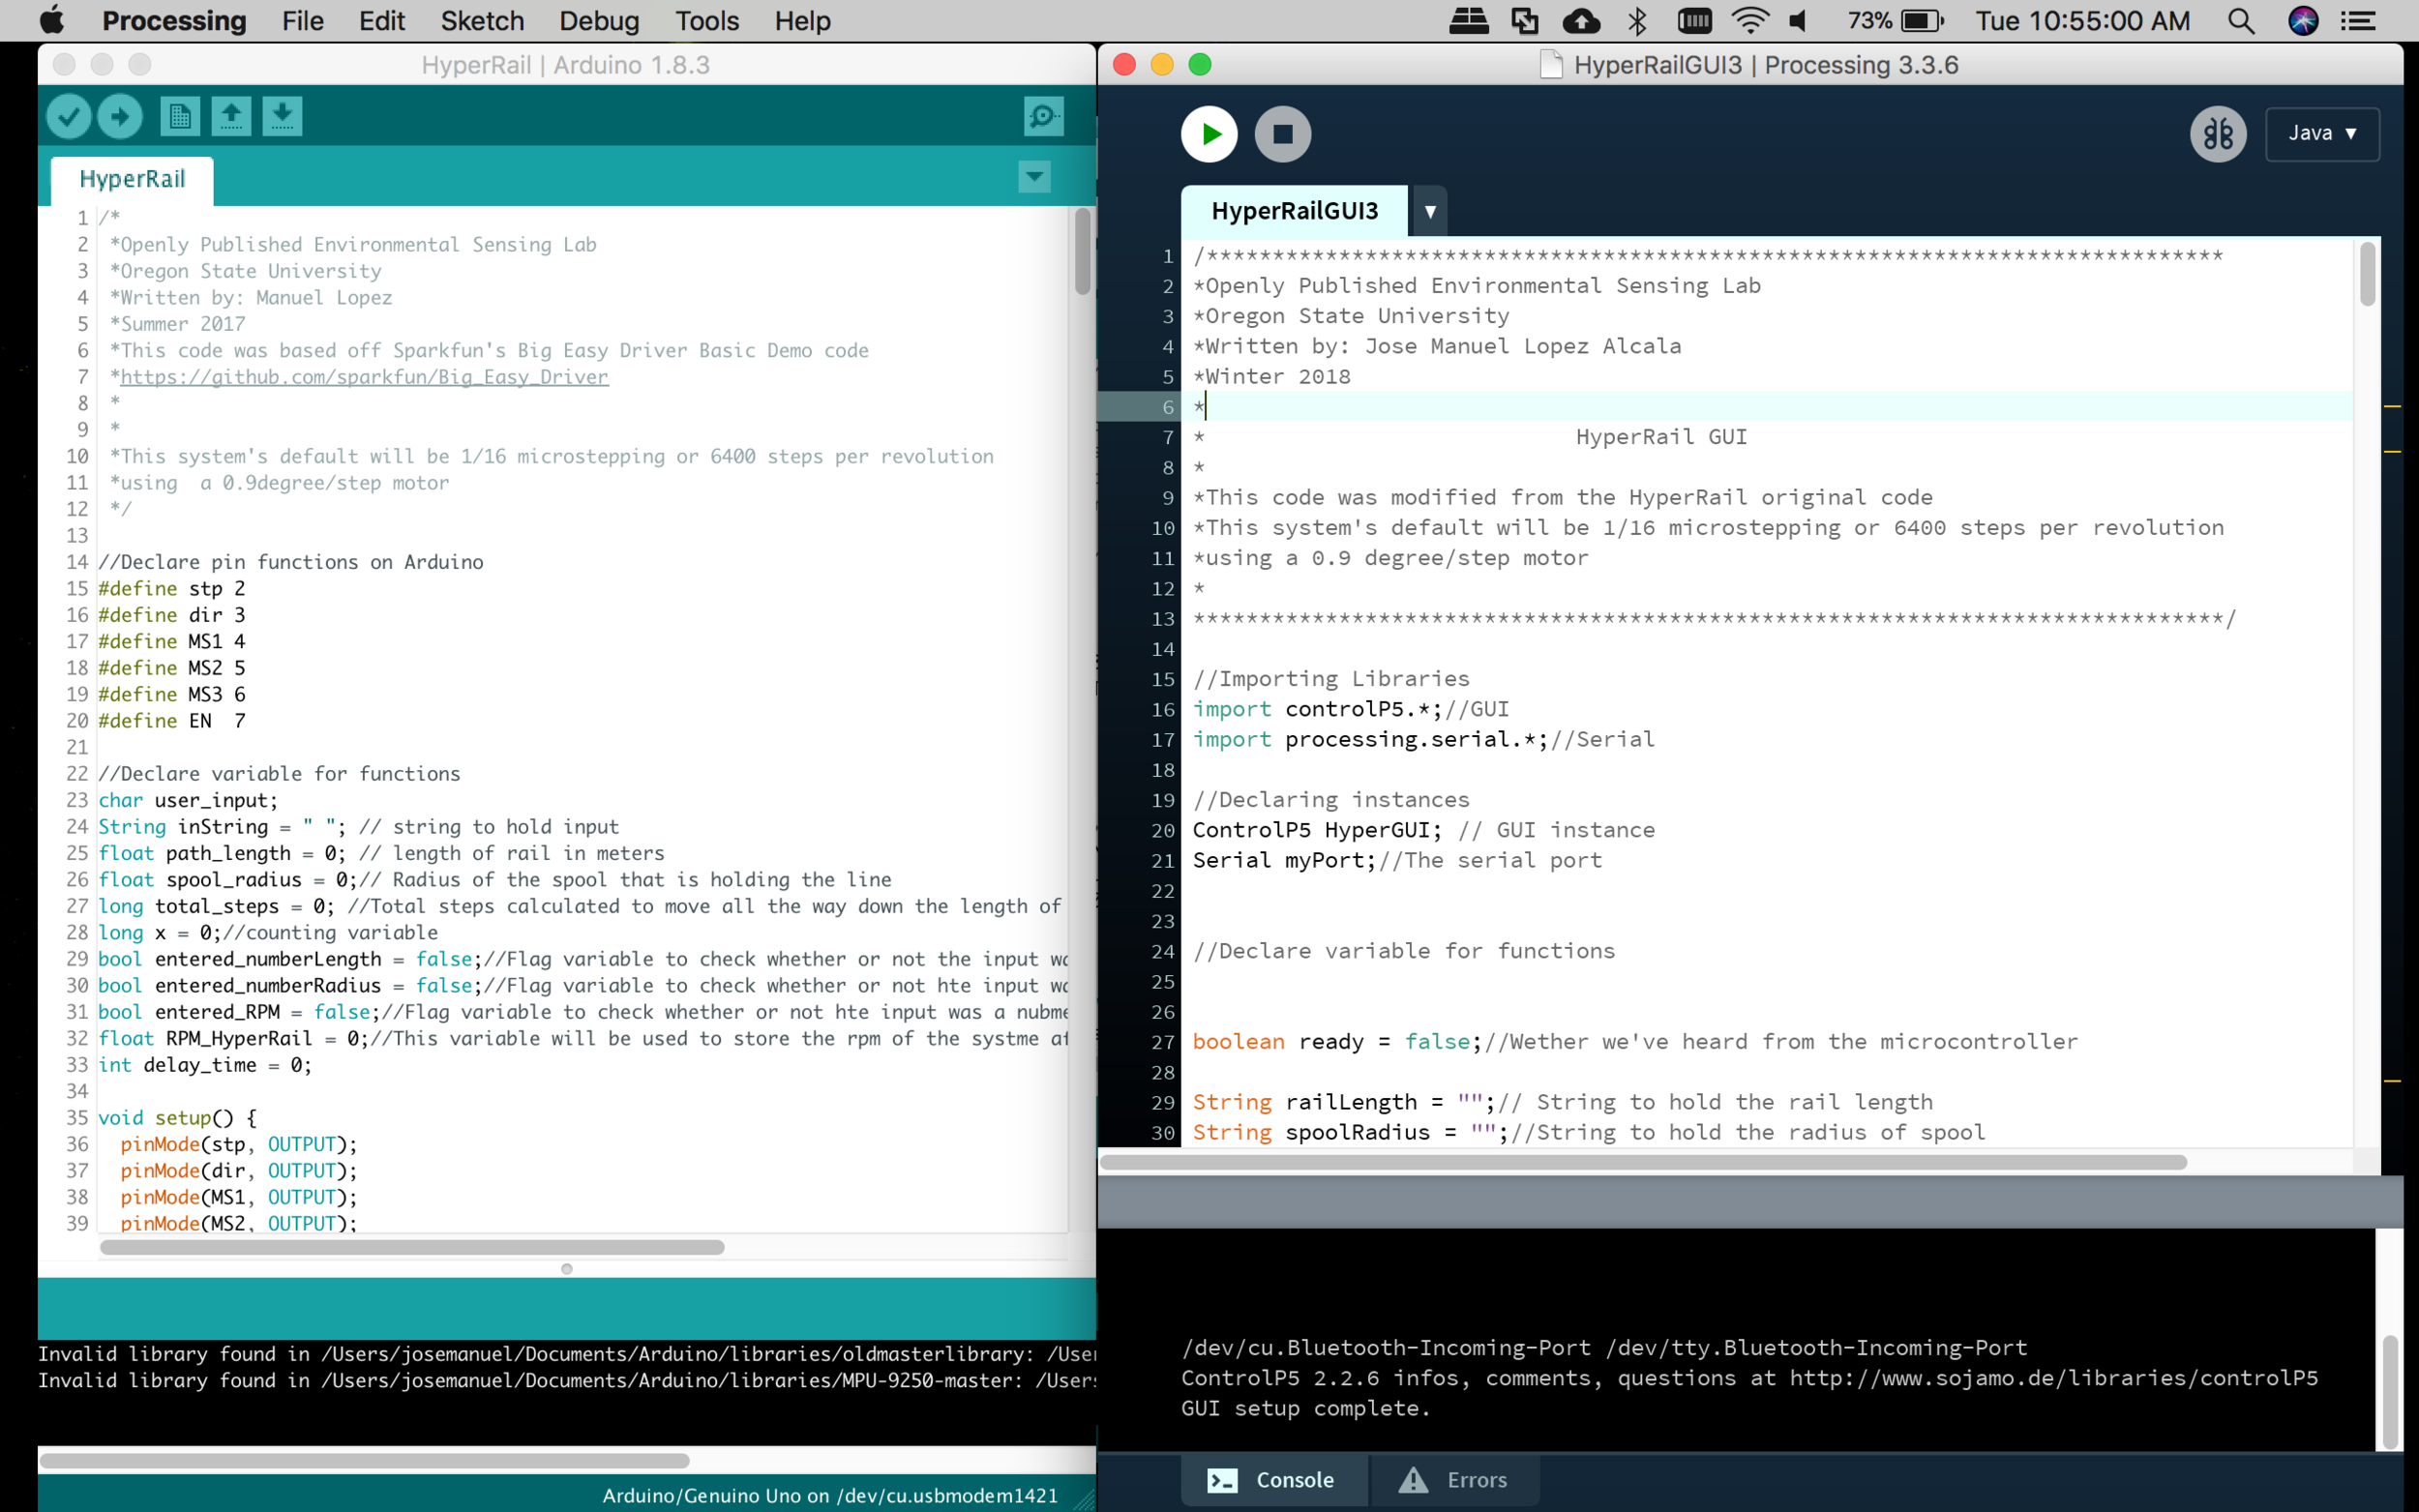
For this part of the project, I am using Processing to create the GUI. This is an open source and cross-platform interface for writing code geared towards a visual processing of data and it has over 100 libraries that are readily available to make it easier for you to code. Another cool thing is that if you already use the Arduino IDE, then this IDE is going to look very familiar:


Screenshot of the two IDEs. Left is Arduino and right is Processing
This is what the current GUI for the HyperRail looks like:


Screenshot of the HyperRail GUI
I initially had the GUI controlling the Arduino using a library that the Processing software had already, but the problem came when I tried controlling the stepper motors from the GUI. What was happening is that the software does not have a delayMircroseconds() function making the controlling of the stepper motors very difficult. This is due to the fact that the function controlling the stepper motors is using microsecond-delayed pulses to move the motors. I think the reason it doesn’t have one is that it would not be able to communicate fast through the serial port. After doing more research online, I came to the conclusion that the best way of fixing this problem would be to have them be independent of each other, meaning that the Arduino would have control of the stepper motor and only be receiving triggers from the Processing. This also means that processing will be doing all the calculations to determine the total steps needed to travel the length of the HyperRail and conversion from velocity(mm/s) to RPM, this way the Arduino only is dedicated to moving the motor and not performing any calculations.
What I ended up doing is having the microcontroller send a signal to the application and then, having acknowledged that signal, have the application send the option the user chose and numbers it calculated over to the microcontroller. The microcontroller will then parse the incoming string and extrapolate the values it got from the application to then use them to move the motor at the correct speed and direction. Here is a demo of what the GUI does:
Conclusion:
The GUI’s basic functions are all almost operational. At this moment I need to finish the code on the Arduino side for the parsing. After that, I will be doing some testing to see it actually works and then finish up incorporating the slider bar for quick positioning and the “Go to location” option so that the user can input specific location along the length of the rail and make the carriage go to it.
