
The rain catchment check valve was essentially shelved mid summer to move on to projects that showed more promise after poor performance of the design. Recently a researcher requested I send a couple check valves to her to set up in Kenya later in March, and so I decided to spend some time seeing if I could redesign the checkvalve in a more purposeful manner rather than trial and error, this time with more knowledge and resources (the Fusion3 F400 3D printer is so fast!). The purpose of the rain catchment check valve is to allow water through flow, while limiting the size of (ideally sealing) the drain to significantly reduce evaporation of collected water samples. The water flows from the TAHMO station to the checkvalve and drains into a collection bag.
This design would be based on a similar function as the last one: water flows into a chamber and raises a buoy, opening a drain that allows the water in the chamber to flow down and into the collection bag. I decided to incorporate an O-ring to assist in blocking the drain when little to no water is left in the chamber. While the original design allowed the buoy to be printed inside the chamber during the same print, using an o-ring meant the chamber and buoy should be printed as separate parts. This actually turned out to work better, anyways. In order to seal the top of the chamber a third part, the cap, would need to be made. I designed it to be twisted on the outside of the chamber’s top, pressing a large O-ring against the top edge of the chamber with enough force to form a watertight seal.
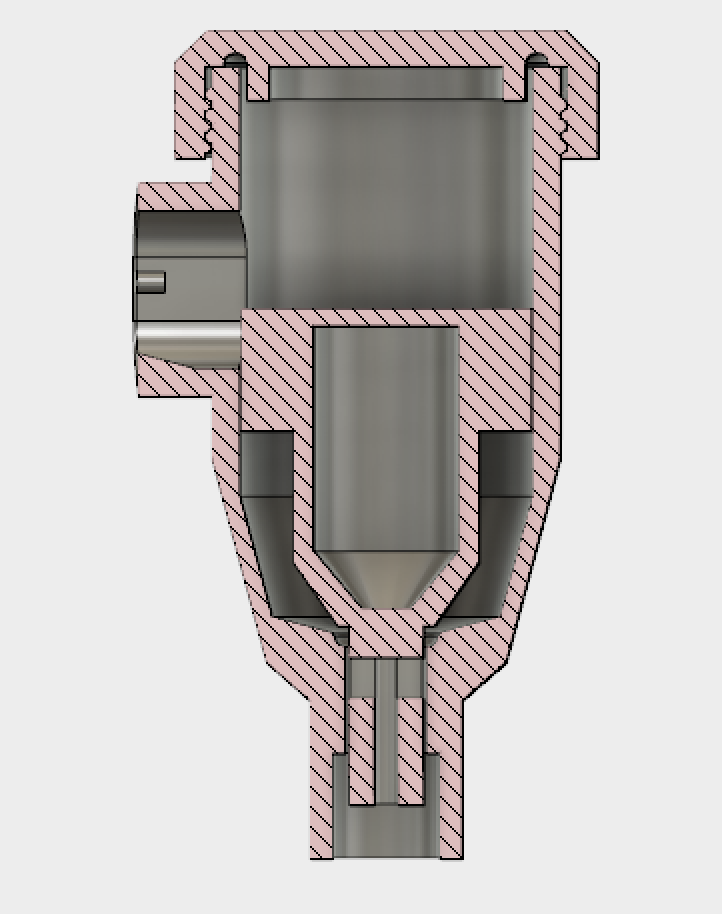
To connect to the TAHMO station, the side opening slides over the TAHMO’s spout and a long ziptie is looped around the TAHMO station and the valve’s outer wall, pressing the two together. This means the water enters the chamber at a low velocity and angle, which is significant because the momentum of the water is directed nearly horizontally and initially at the top of the buoy. This means the force on the buoy from the flowrate of the water acts to tilt it off of its seal rather than add force to the seal of the O-ring.
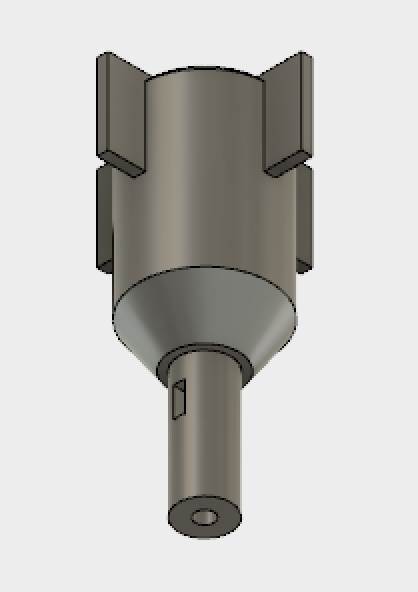
One of the largest issues in the original design was the buoy’s lack of a correcting method after being tilted. There were two ways I could fix this: place the center of mass of the buoy as low as possible, and to find a way to limit its movement to the vertical axis. While I kept the first option in mind, such a small mass (<3g) can easily be overcome by small pressures such as a water droplet or a defect in the print. The fins on the side of the buoy act to prevent more than a couple degrees tilting.
The main problems to overcome are friction and catching on the sides of the chamber walls. Some dimensions require adjusting to properly fit onto the TAHMO station. Overall, this design works significantly better than the previous version.