Pumps and Pump Mounting

Several design decisions were made based on our pump parameters needed. For example, we need at least one meter of pump head and we need to be able to move water through roughly 5 meters of 3/16” (.476 cm) tubing (most likely there will be less tubing involved, but this is a good number to start with).

Through observation, I found that the throughput of a single pump at 1m head and room temperature was 50mL/min, or .83 cm^3/s, and the maximum suction head is greater than 1.5 meters, which was the highest I could place the pump without creating a more complex setup. 

With a tubing cross sectional area of .71 cm^2, the velocity of the water in the tube being moved by the pump is about 1.2 cm / s. With such a small velocity, the head loss directly resulting from the 26 tee joints is about .76 cm, and the head loss from the friction of the tubing is even less than that. 

Because we don’t have to worry about head loss, and the max head one pump can provide exceeds our requirements, I decided that the design should combine two pumps in parallel to improve throughput rather than in series to improve head. 

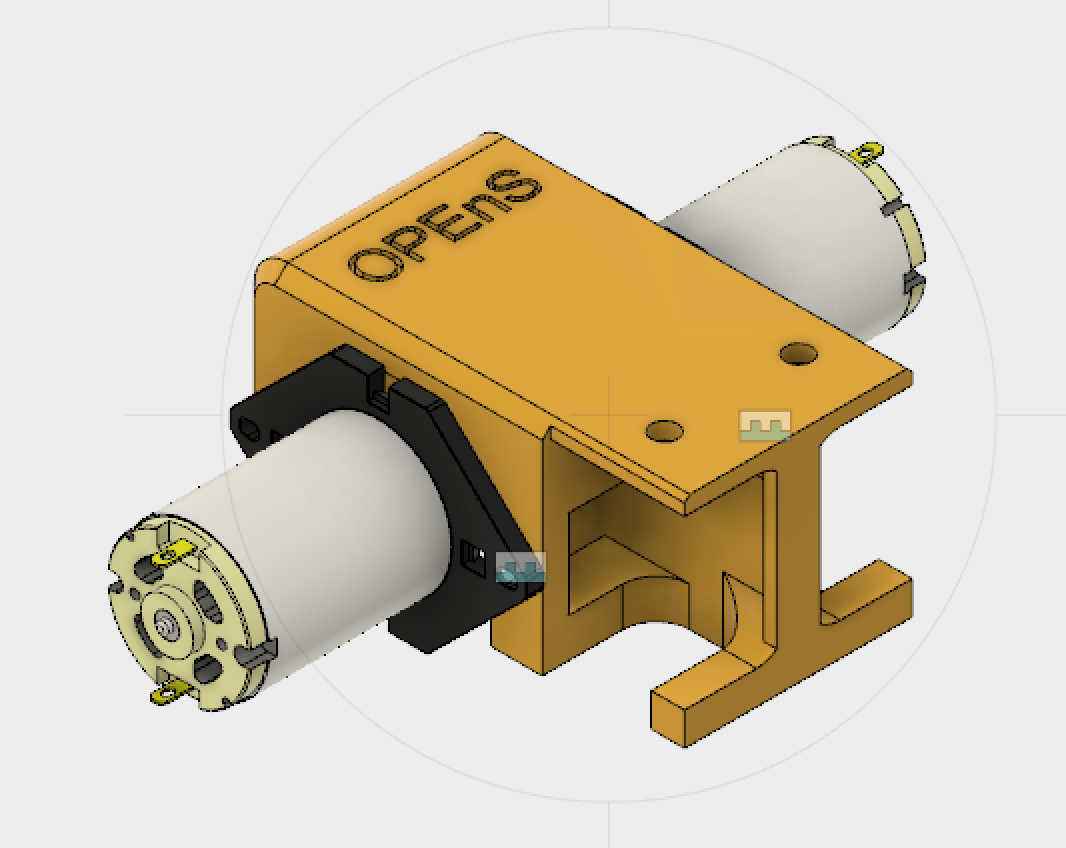
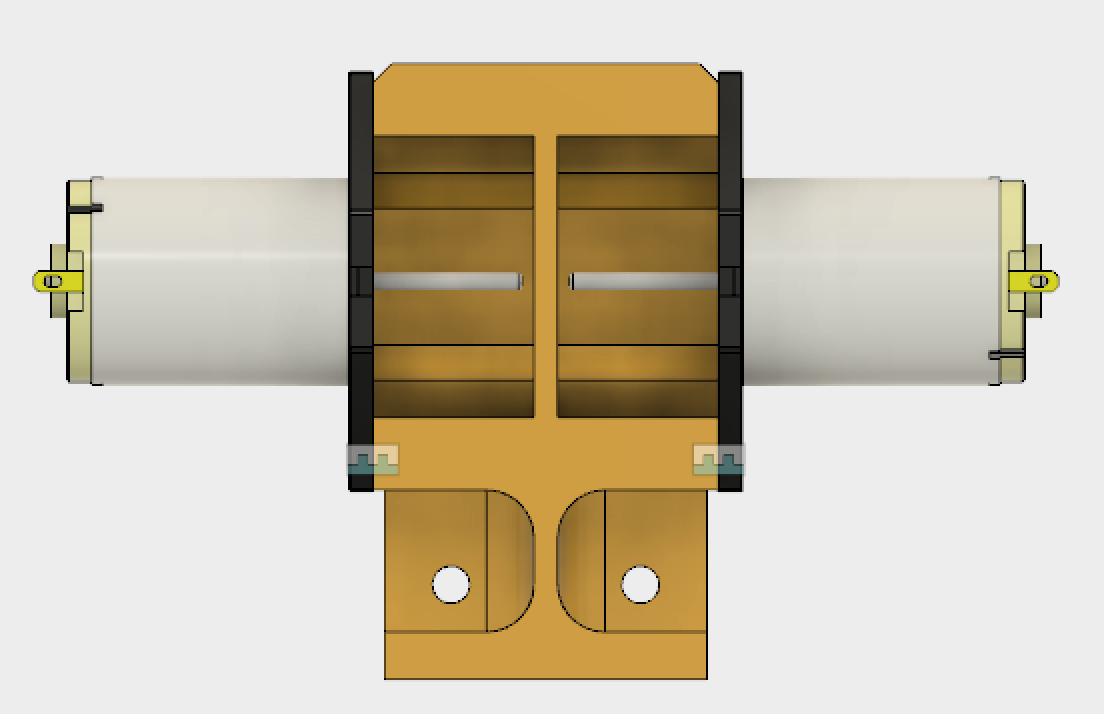
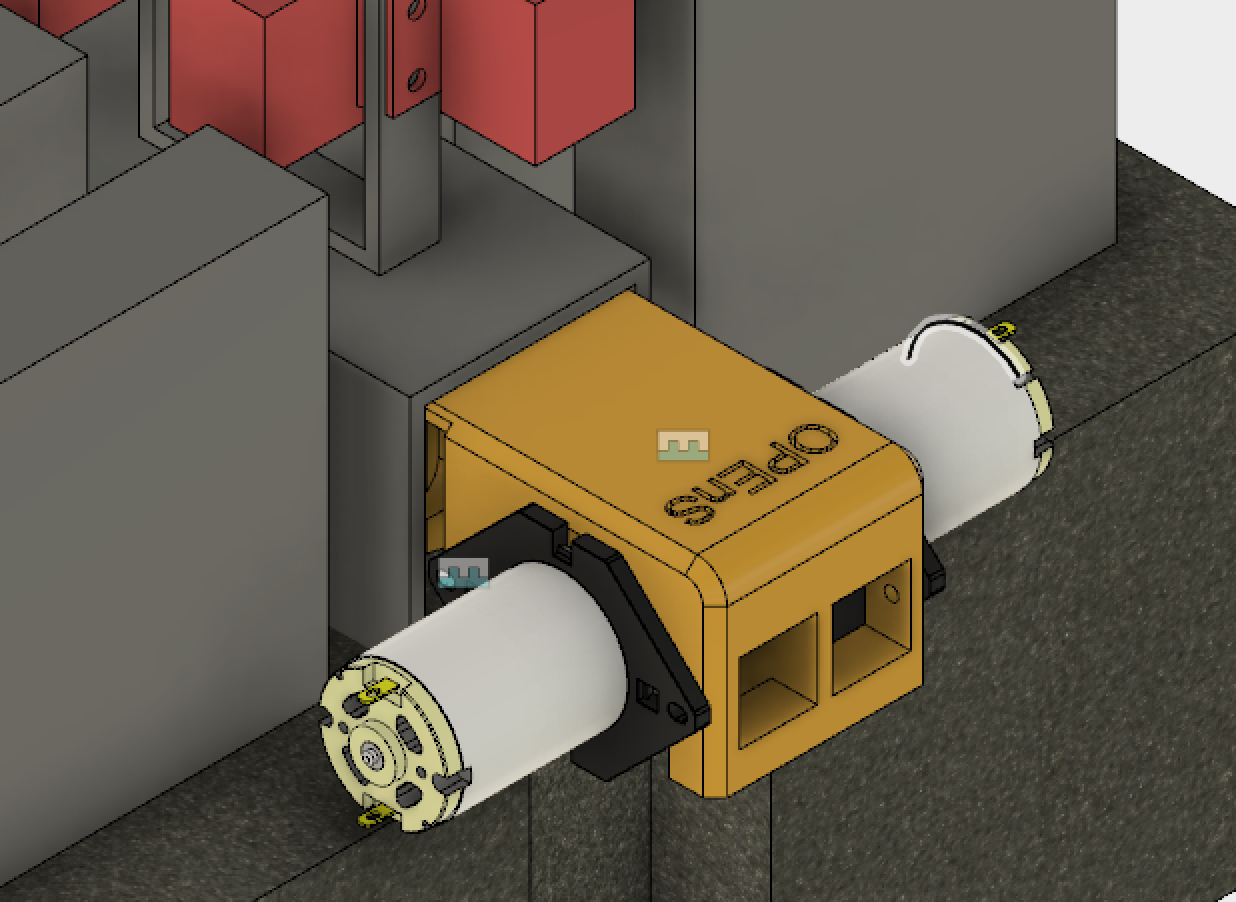
Now I could design the dual pump mount! I went with a design that mounted on the inside of the C-Channel spine, with the colinear, top-to-top facing pumps sticking out perpendicular to the c channel. The first 3D Print should be finished tomorrow! Pictures below.


twopumpmount.jpgtwopumpmount.jpg


twopumpmount2twopumpmount2


twopumpmount3twopumpmount3

Schematics!

I’ve completed two schematics for this project. The first is the base unit schematic (above). This is the main unit we will develop first. The schematic includes 8 valves (shown as inductors on the schematic) and one TPIC power shift register for controlling them. 6 lines are connected to a header: 5V, 12V, GND, SCK, DATA, and RCK. Because the base unit will have 24-31 bags for sampling, rather than 8, we will be using 4 TPICs in series on a single board to control a corresponding number of valves. The 3 additional TPICs will be connected in the same way shown in the extension unit schematic (below), only without headers in between sequential TPICS and only using one waste valve at the end. 


Screen Shot 2017-01-24 at 4.04.53 PM.pngScreen Shot 2017-01-24 at 4.04.53 PM.png

Eventually, extension units will allow additional samples without adding complexity to the process. 6 wires and one water line will connect the base unit to subsequent extension units, each with 24 bottles and an output line themselves. 


The dummy switch, which is meant to represent a water probe that will be located at the end of each unit to check that water has flowed to the end. This is critical to the system’s sampling process: if the system tries to sample a specific amount of water based on the time the pumps are running, then it needs to know when to start timing. The probe will “short” like flipping a switch (though with much much more resistance) and send a low signal to a digital pin.

New Rain Validator Experiment


Today I set up a new experiment using the old HP tablet and OHAUS usb scales. The setup was three scales connected to the tablet, which was running Jim Wagner’s custom logging software, ScaleWatcher v3. A beaker filled nearly to the top, a wickless validator filled nearly to the top, and a validator with wick saturated and filled nearly to the top with water will have their masses logged every 10 minutes for a month or until the validators are dry. The wicked validator has a dry weight of 191 grams, while the wickless validator has a dry weight of 75 grams. The beaker and wicked validator are on 4000g scales and the wickless validator is on a 600g scale.


Posted by Mitch

Updated Validator Data

After another day of data, I created another set of graphs that displayed the relationship between the ratio of beaker mass to validator mass and validator’s water mass (calculated by subtracting the dry weight of the validator from each data point), per Selker’s request. What this graph shows is that the validator’s water evaporates at a faster rate relative to the validator’s total mass than the water in the beaker. Below is the set of graphs for trial 1 and trial 2.


ratio vs val waterratio vs val water

Rain Validator Observational Experiment Results


validator datavalidator data

The rain validator test has undergone two trials, each spanning about two weeks. The results so far seem to be promising: the validator’s rate of evaporation is very similar to the beaker’s. Below is a graph of the average rate of evaporation at each point, calculated by taking the difference in mass between each set of points and dividing that by the change in time between them.

In all graphs, red represents the data from the beaker, while blue represents the data from the validator.


validator evaporation rate vs timevalidator evaporation rate vs time

It’s interesting that for both trials, the rain validator’s water evaporates at a faster rate for the first day and then it’s rate becomes increasingly slower than that of the beaker. The beaker has a larger radius, so this is likely due to a combination of the saturated wick having more surface area and a smaller percentage of the validator’s total mass remaining over time compared to the beaker. This can be seen in the right two graphs in the first picture: the beaker’s percent mass decreases more linearly than the validator’s, which has a slight upward concavity.

Some errors with these trials include the changing humidity of the environment as well as the temperature of the room, especially since the beaker and validator were set near an oven that ran at varying temperatures for varying amounts of time. Because the beaker’s and validator’s locations were constant and adjacent, the validator’s performance can accurately be compared to that of a plain, 1L beaker of water.

Super Validator

The first prototype of the rain catchment validator seems fairly successful. We have yet to attach a strain gauge to it, though some testing is being done to see how the evaporation rate compares to water in a 1 L beaker, started by Dr. Selker before he left.

The design was changed to fit to the strain gauges we purchased, though it seemed flimsy and I had concerns about the strain gauge connection bending or breaking under stress, as well as the layers delaminating or the overall form of the device changing over time. I added some structural supports to most aspects of the design (picture 2) and am running a print now. This version should be able to be tested with the strain gauges.


Isotopic Sampler Bag Cap

A custom bag cap was necessary to function as a sealed connection between the aluminum foil bag and the fitting on the copper tube that attaches to the checkvalve. The dimensions of the bag’s mouth were measured with calipers and a first prototype was designed based on two pieces: an inner piece that presses against the end of the mouth with an o-ring and that can be tapped to fit to a 1/8 NPT fitting, and an outer piece that screws onto the mouth and forces the inner piece to seal (see picture 2).

The first prototype worked well and was lightly modified over time. Most of the caps were printed in HIPS as we were out of ABS at the time, but both ABS and HIPS print well.

Wind Vane Body with Electronics

After several designs I finally finished one that looked like it would function well enough.Screen Shot 2016-07-22 at 4.23.34 PM

So far it’s separated into three parts: the tail which also houses the battery, the head which houses most of the electronics, and the front cover which was made invisible in the above picture.

I printed the head first with 30% grid infill but that seems to be too much. I’ll either change the x/y/z distance for support or move that down to 25%, or both. The support was very difficult to get off and took some of the thin walls with it.

IMG_1036

The other side came out very nicely and the humidity sensor and pressure sensor fit perfectly.

IMG_1034

Next I’ll add a spot for the SD card board and try printing the tail. I still need to figure out the rest of the case and how to snap fit the entire thing together, as well as how to snap it onto the fiber optic cable.

Water Collection Pouch Cap

IMG_0001

Finished and printed the first design of the rain collector pouch cap. It’s two parts: one that presses against the top of the opening with an o-ring and another that screws onto the pouch’s threaded mouth, which presses onto the first part as it is tightened.


Screen Shot 2016-07-18 at 2.24.29 PM

This assembly was designed in Fusion 360 rather than OpenSCAD so I could design it quickly. Designing multiple parts that are dependent on each other can be significantly easier using Fusion360 than it is with OpenSCAD, though OpenSCAD has its advantages.

The threads were made by creating a helix and then sweeping an area through the path of the helix. It added some twisting but prints and fits just fine in both ABS and HIPS.